There is two main products in the Azure offering for hosting microservices: Azure Functions and Logic Apps. The former is a code-first integration service designed for developers, the latter is a configutation-first integration service which makes it easy to build processes and workflows and integrate with various SaaS and enterprise applications.
The internet is full of articles showing how to setup a Serverless Architecture with Azure leveraging Azure Functions and/or Logic Apps. But what when you need to apply authentication to your architecture?
Setup
Start by creating a new Function App and add it a simple HttpTrigger C# function that we will call SayHello.
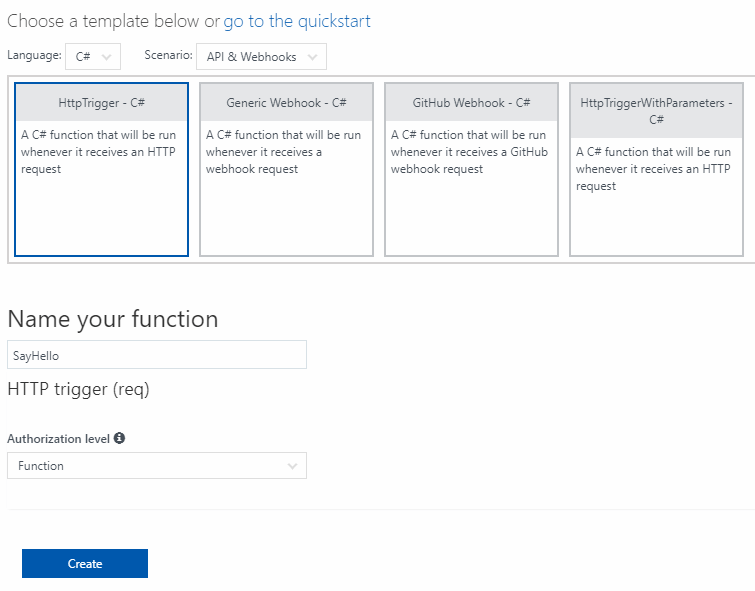
This will create a default method who return "Hello" + name where name is either an url parameter or a JSON property passed on the body.
Azure Functions Proxies
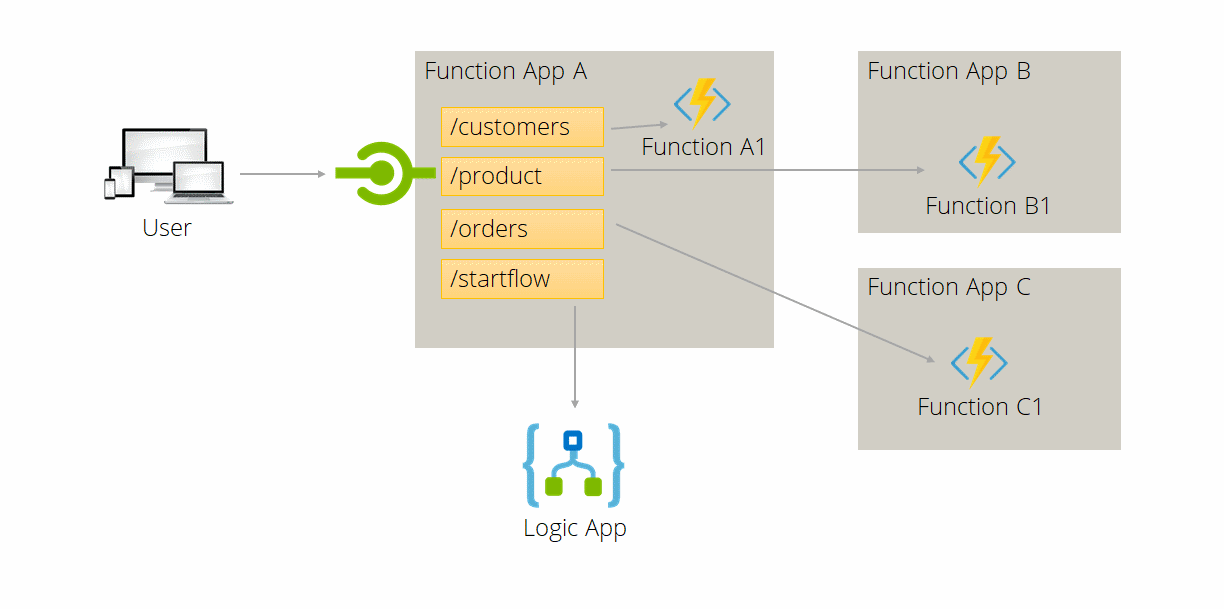
Functions Proxies is a new feature of Azure Functions. It let you specify endpoints on your function app that are implemented by another resource. It useful to break a large API into multiple functions apps while still presenting a single API surface. It could also be used to present a nicer url for a Logic App. The following image shows you how to create an homogeneous API while organizing your application in a microservice architecture.
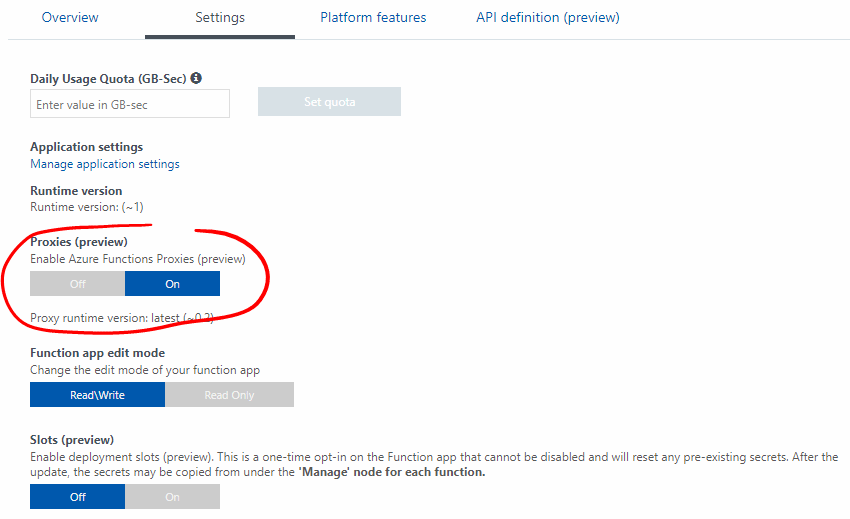
Start by enabling Proxies in your Azure Function Apps. Go to Settings and switch the Proxies (preview) to On.
We will now create a new endpoint for our SayHello Function. We will limit the verb to GET and define the parameter {name} in the route template. The Backend URL will be the Azure Function URL with two parameters: the name and the code. The name is the value used by the function and the code is the security token for the Azure Function. See Work with Azure Functions Proxies for more information on proxy creation.

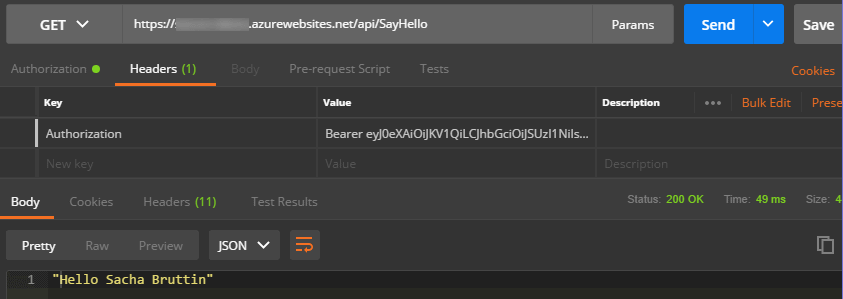
Try your new proxy by browsing to: https://yourfuncapp.azurewebsites.net/api/hello?name=foo and verify that you get this wunderfull result:
<string xmlns="http://schemas.microsoft.com/2003/10/Serialization/">
    Hello foo
</string>
How to secure it?
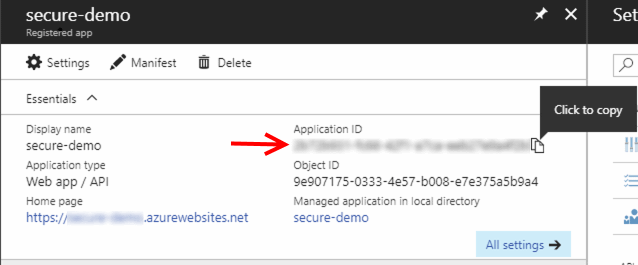
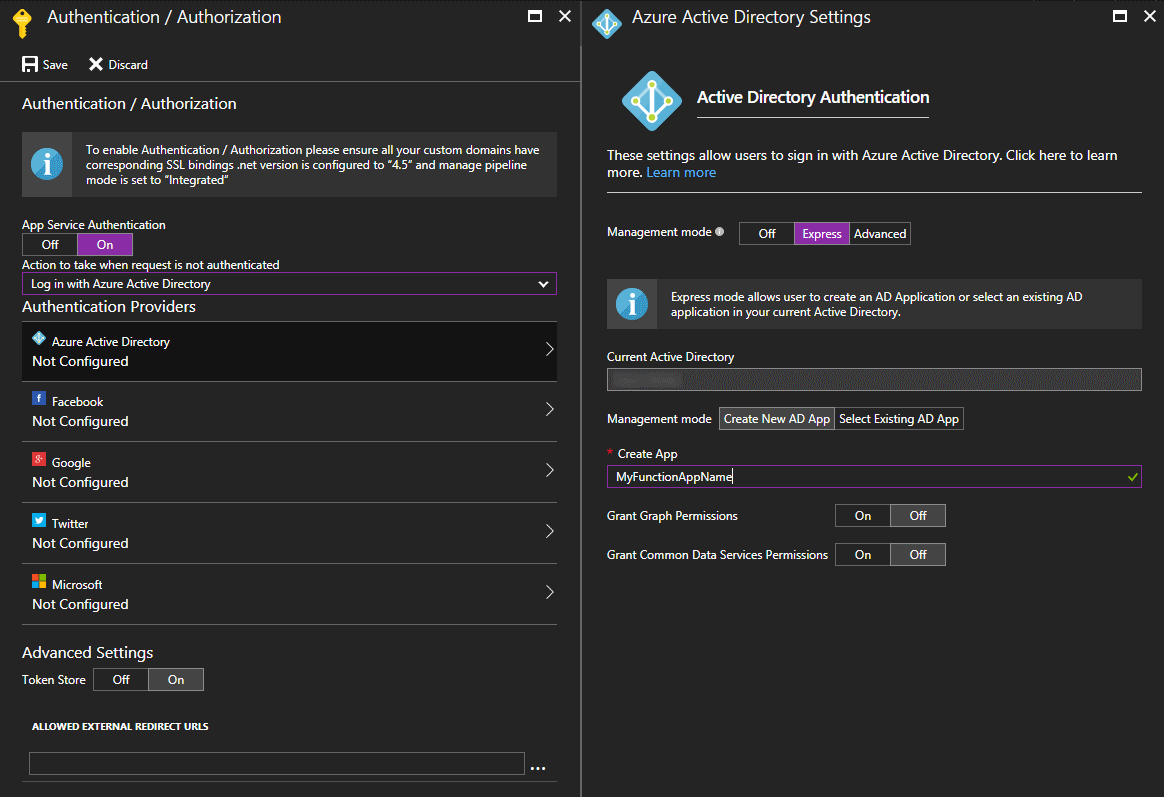
Azure Functions is built on top of Azure App Service. So we will simply enable Easy Auth, a neat feature of App Service. Go to Platform features and click on Authentication / Authorization. We will select Azure Active Directory with the Express configuration for the success of the rest of this article.
Now, if you try to call an Azure Function from your browser you will be redirect to the classic AAD Login Page. Our API is now fully protected from unauthorized call, either calling directly an Azure Function or by passing through a proxy endpoint. But Easy Auth has a lot more to offer. We are going to modify slightly our Function to say hello to the logged user. Replace the code in the SayHello Function:
using System.Net;
using System.Security.Claims;

public static async Task<HttpResponseMessage> Run(HttpRequestMessage req, TraceWriter log)
{
    var name = ClaimsPrincipal.Current.FindFirst("name").Value;

    return name == null
        ? req.CreateResponse(HttpStatusCode.BadRequest, "'name' not found in the claims list!")
        : req.CreateResponse(HttpStatusCode.OK, "Hello " + name);
}
And change the Proxy:
- Route template:
/api/hello
- Backend URL:
https://yourfuncapp.azurewebsites.net/api/SayHello?code=...
Try your new Function by browsing to: https://yourfuncapp.azurewebsites.net/api/hello and verify that you get your name correctly displayed.
Call a secured Azure Function from Logic App
Now, it is a common scenario to call an Azure Function from a Logic App. For the purpose we will create this simple Logic App and hide it behind an Function Proxy to protect it.
{
    "definition": {
        "$schema": "https://schema.management.azure.com/providers/Microsoft.Logic/schemas/2016-06-01/workflowdefinition.json#",
        "actions": {
            "Response": {
                "inputs": {
                    "body": {
                        "whoIam": "@{body('SayHello')}"
                    },
                    "headers": {
                        "Content-Type": "application/json"
                    },
                    "statusCode": "@outputs('SayHello')['statusCode']"
                },
                "runAfter": {
                    "SayHello": [
                        "Succeeded"
                    ]
                },
                "type": "Response"
            },
            "SayHello": {
                "inputs": {
                    "function": {
                        "id": "/subscriptions/<sub-id>/resourceGroups/<resource-group>/providers/Microsoft.Web/sites/<function-app>/functions/SayHello"
                    }
                },
                "runAfter": {},
                "type": "Function"
            }
        },
        "contentVersion": "1.0.0.0",
        "outputs": {},
        "parameters": {},
        "triggers": {
            "manual": {
                "inputs": {
                    "method": "GET",
                    "schema": {}
                },
                "kind": "Http",
                "type": "Request"
            }
        }
    }
}
If you try to call your new proxy, you will receive an beautiful error. Digging into the Logic App run, you will find this as the output of the SayHello action:
{
    "statusCode": 401,
    "headers": {
        "Date": "Fri, 07 Jul 2017 07:50:11 GMT",
        "Server": "Microsoft-IIS/8.0",
        "WWW-Authenticate": "Bearer realm=\"<edited>\"",
        "X-Powered-By": "ASP.NET",
        "Content-Length": "58",
        "Content-Type": "text/html"
    },
    "body": "You do not have permission to view this directory or page."
}
Ok, we need to pass authentication to the call to succeed. But the Azure Function connector in Logic Apps does not contains authentication parameters like the HTTP connector. Are we forced to replace the convenient Azure Function connector by the HTTP one? No!
Thanks to Easy Auth, the forwarded HTTP calls from the Azure Functions Proxies are enhanced by a lot HTTP Headers. Take a look at this article from @cgilum about the App Service Token Store.
Replace your Logic App code with this:
{
    "definition": {
        "$schema": "https://schema.management.azure.com/providers/Microsoft.Logic/schemas/2016-06-01/workflowdefinition.json#",
        "actions": {
            "Response": {
                "inputs": {
                    "body": {
                        "whoIam": "@{body('SayHello')}"
                    },
                    "headers": {
                        "Content-Type": "application/json"
                    },
                    "statusCode": "@outputs('SayHello')['statusCode']"
                },
                "runAfter": {
                    "SayHello": [
                        "Succeeded"
                    ]
                },
                "type": "Response"
            },
            "SayHello": {
                "inputs": {
                    "function": {
                        "id": "/subscriptions/<sub-id>/resourceGroups/<resource-group>/providers/Microsoft.Web/sites/<function-app>/functions/SayHello"
                    },
                    "headers": {
                        "Authorization": "@{concat('Bearer ', triggerOutputs()['headers']['X-MS-TOKEN-AAD-ID-TOKEN'])}"
                    },
                    "method": "GET"
                },
                "runAfter": {},
                "type": "Function"
            }
        },
        "contentVersion": "1.0.0.0",
        "outputs": {},
        "parameters": {},
        "triggers": {
            "manual": {
                "inputs": {
                    "method": "GET",
                    "schema": {}
                },
                "kind": "Http",
                "type": "Request"
            }
        }
    }
}
What we did is just pass the X-MS-TOKEN-AAD-ID-TOKEN generated by Easy Auth to our Azure Function. If you try to call your Azure Function Proxies endpoint from a browser you will receive a nice greeting.
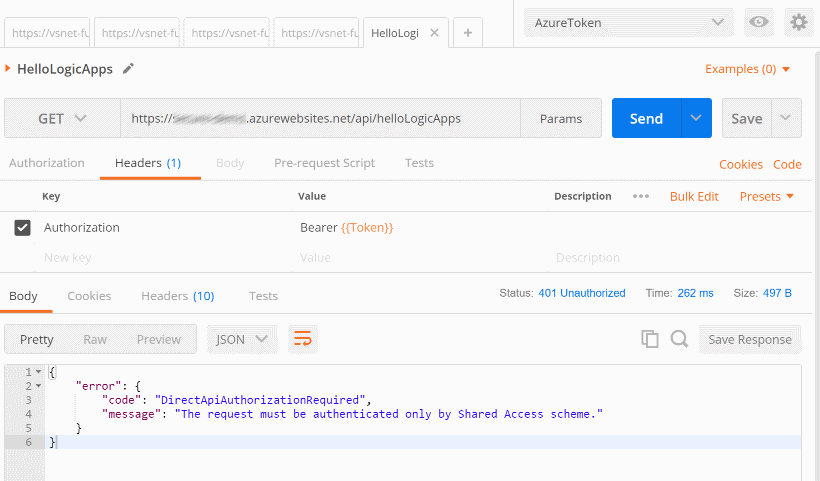
The request must be authenticated only by Shared Access scheme.
This is the error you will receive if you try to call your endpoint from a SPA application or a tool like Postman. This is because the Logic App is already protected by a SAS token and that Azure Function Proxies is forwarding the Authorization header we send him to authenticate our request.
Lets try to reproduce it before fixing it! Open Postman and import the following collection:
{
	"variables": [],
	"info": {
		"name": "Test",
		"_postman_id": "08766fd2-ecd3-94c9-9649-54cb6d549136",
		"description": "",
		"schema": "https://schema.getpostman.com/json/collection/v2.0.0/collection.json"
	},
	"item": [
		{
			"name": "HelloLogicApps",
			"request": {
				"url": "https://yourfuncapp.azurewebsites.net/api/helloLogicApps",
				"method": "GET",
				"header": [
					{
						"key": "Authorization",
						"value": "Bearer {{Token}}",
						"description": ""
					}
				],
				"body": {},
				"description": ""
			},
			"response": []
		}
	]
}
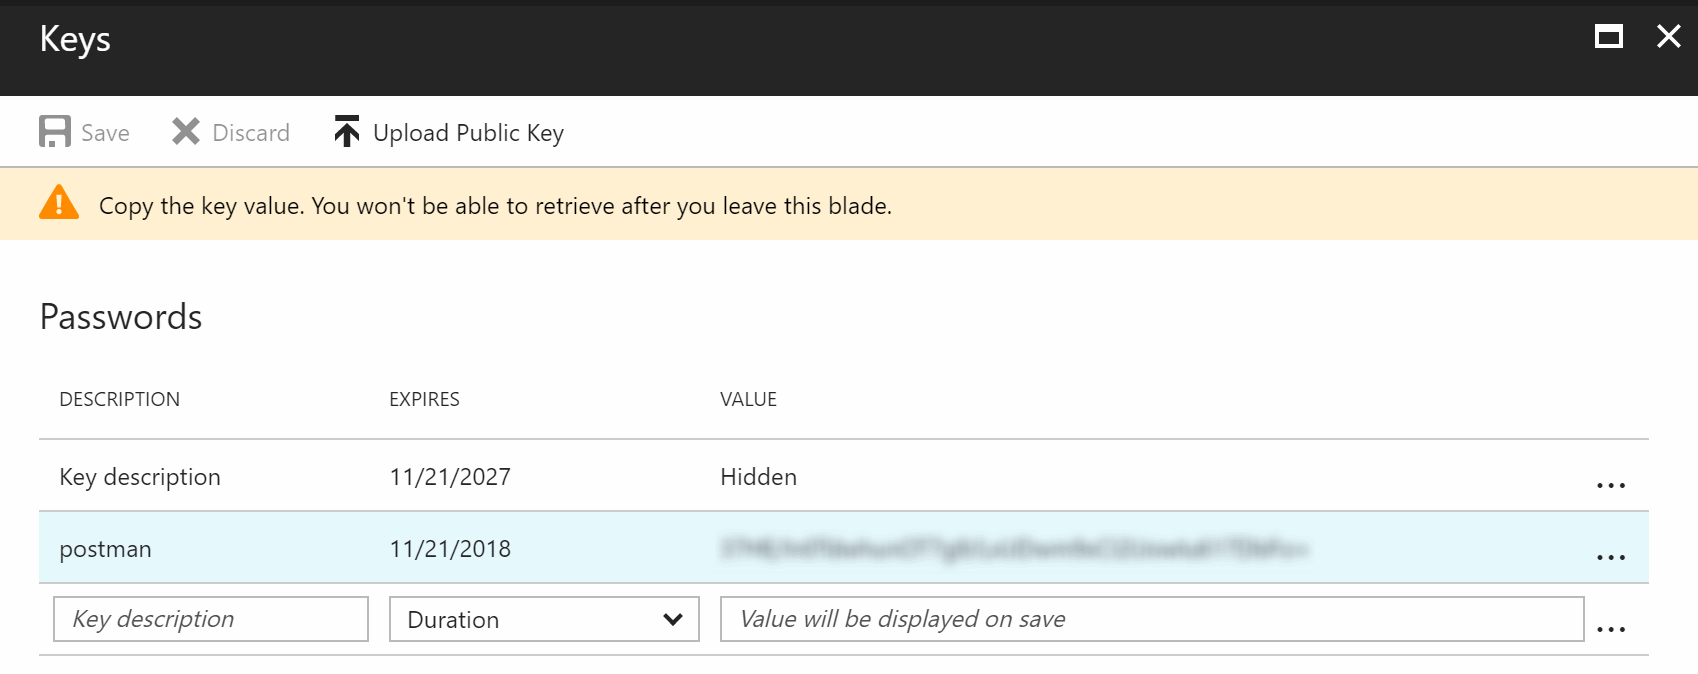
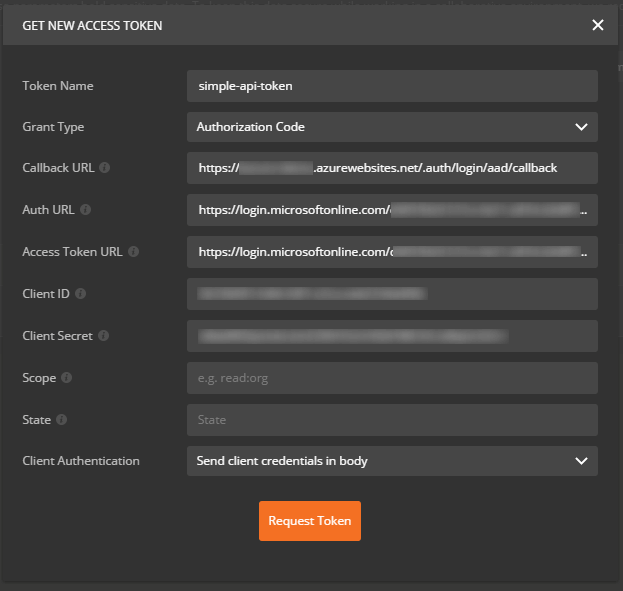
Create a new Environment with a Token key. Open your browser and go to this url https://functionapp.azurewebsites.net/.auth/me to copy/paste the id_token into Postman. Click on Send…
The solution is the same as in my previous article: Secure your Logic Apps with Azure AD and API Management. We need to remove the Authorization header from the call done by the proxy to the Logic App.
To do this in Azure Function Proxies, we will need to edit the proxies.json file and and add a requestOverrides object to our proxy definition. We will do it from the App Service Editor. Your proxies.json should will look like this:
{
    "$schema": "http://json.schemastore.org/proxies",
    "proxies": {
        "Hello": {
            "matchCondition": {
                "route": "/api/hello",
                "methods": [
                    "GET"
                ]
            },
            "backendUri": "https://function-app.azurewebsites.net/api/SayHello&code=<edited>"
        },
        "Function": {
            "matchCondition": {
                "route": "api/helloLogicApps",
                "methods": [
                    "GET"
                ]
            },
            "backendUri": "https://prod-37.westeurope.logic.azure.com:443/workflows/<edited>/triggers/manual/paths/invoke?api-version=2016-06-01&sp=%2Ftriggers%2Fmanual%2Frun&sv=1.0&sig=<edited>",
            "requestOverrides": {
                "backend.request.headers.Authorization": ""
            }
        }
    }
}
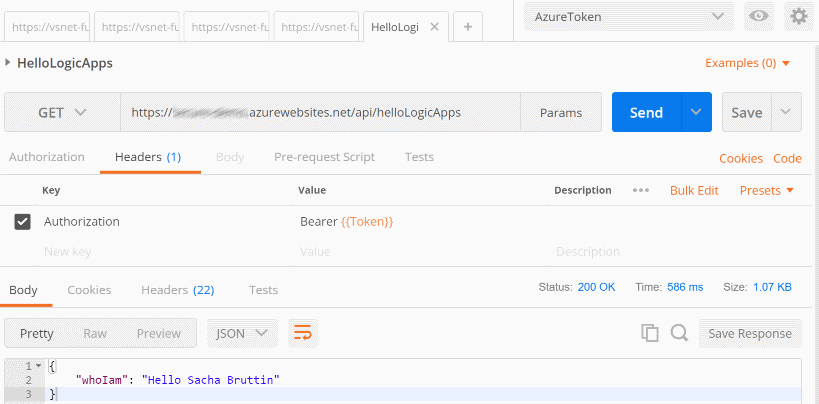
Overriding the Authorization header by an empty string will remove totally the header entry. Go back to Postman and re-send the query! Et voilà!
Conclusion
Azure Function Proxies + Easy Auth is a lightweight solution to secure your Serverless Architecture on Azure. It overlaps with Azure Management API but does not offer all the advanced features you get on APIM like throttling, caching and the developer portal.
However, the cost of Azure Function Proxies will be way cheaper than APIM and as Azure Function is based on App Service, it is easy to deploy your solution using ARM templates.